Viewing and sharing
When your diagram is ready, you can share a read-only view of it with other people, export any part of it as an image, and turn it into a stitch legend and written instructions. This page covers all of these.
The read-only view
Section titled “The read-only view”People you share a diagram with open it in a read-only view: they can look at your chart without being able to change it.
The read-only view has no stitch rail, editing toolbar, or Inspector. Along the top are the diagram name and a View only badge, plus a Save a copy button if you allow it. Viewers can pan, zoom, and explore the chart, browse the Rounds list, and open Stitches used and Generate text from the settings menu — but nothing they do changes your original.
Sharing a diagram
Section titled “Sharing a diagram”You can share a diagram so other people can open the read-only view without needing an account of their own. Select Share at the right end of the header tray in the editor, or choose Share from the ⋯ actions menu on the diagram’s card in Your workspace.
You can share two ways:
- A link anyone can open — create a link and send it to anyone. They see your diagram in the read-only view, and the link shows a preview of your diagram when pasted into most chat apps.
- Named people by email — invite specific people; they get access when they sign in with that email address.
By default viewers can only look. If you turn on Viewers can save a copy, viewers can drop their own editable copy into their workspace, leaving your original untouched.
The full sharing walkthrough — creating and copying a link, inviting people, and revoking access — is in Sharing your diagrams.
Exporting an image
Section titled “Exporting an image”To save part of a diagram as a picture — for a pattern, a listing photo, or a message — use the export tool.
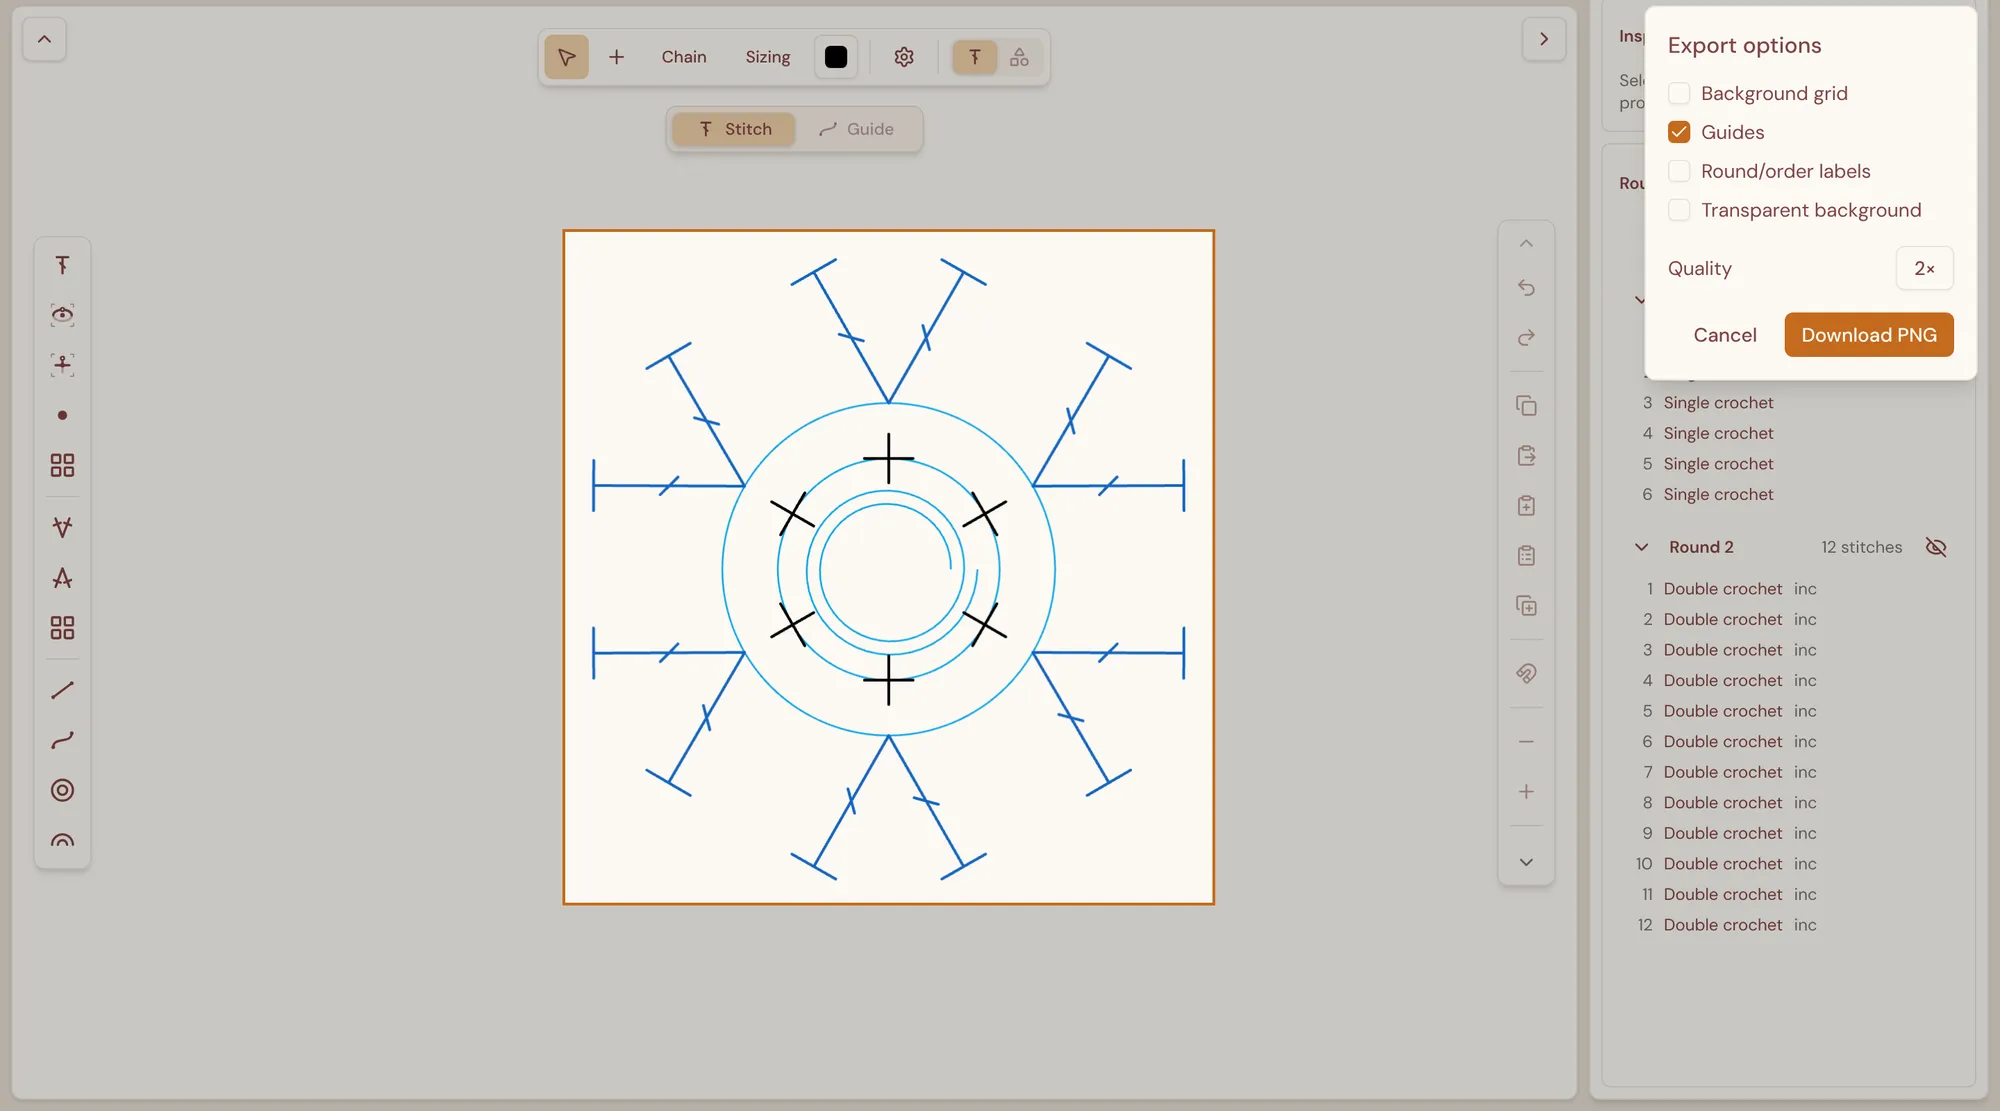
- Select Export range (the download icon) at the right end of the header tray.
- Drag a rectangle across the canvas around the part of the chart you want. Press Esc to cancel.
- In the Export options panel, choose what to include:
- Background grid — include the canvas grid behind the stitches.
- Guides — include any guide lines and circles.
- Round/order labels — include the round and order numbers.
- Transparent background — export with no background instead of white.
- Quality — 1×, 2×, or 3×. A higher setting produces a larger, sharper image.
- Select Download PNG to save the image.
Annotations inside the rectangle are always included. Selection highlights and handles are not, and neither is the canvas background color you chose in the settings menu.
Every exported image carries a small StitchPress badge in its bottom-right corner, along with an invisible watermark that identifies the diagram and the account that exported it.
Stitch legend and written instructions
Section titled “Stitch legend and written instructions”Two items in the Settings gear menu turn your diagram into text:
- Stitches used opens a legend of every stitch type in the diagram, with its symbol.
- Generate text opens Pattern text: written instructions for the diagram, round by round (or row by row), using standard abbreviations — including increases, decreases, and stitches worked into chain spaces. Select Copy to copy the text into your pattern.
The written instructions follow the round and order of each stitch, which you can check and change in the Inspector’s Round & order section and in the Rounds panel.