Crochet editor overview
The crochet editor lets you build crochet diagrams stitch by stitch, from a simple ring of single crochet to complex shaped and colored designs. Instead of drawing symbols by hand, you pick a stitch, place it on the canvas, and connect it to the stitches around it — the chart grows the way your work does, round by round or row by row.
This page introduces the parts of the workspace and how to start a diagram. The rest of this section covers moving around the canvas, adding stitches, working with guides, arranging and shaping stitches, coloring them, cluster stitches, annotations, and sharing the finished chart.
The workspace
Section titled “The workspace”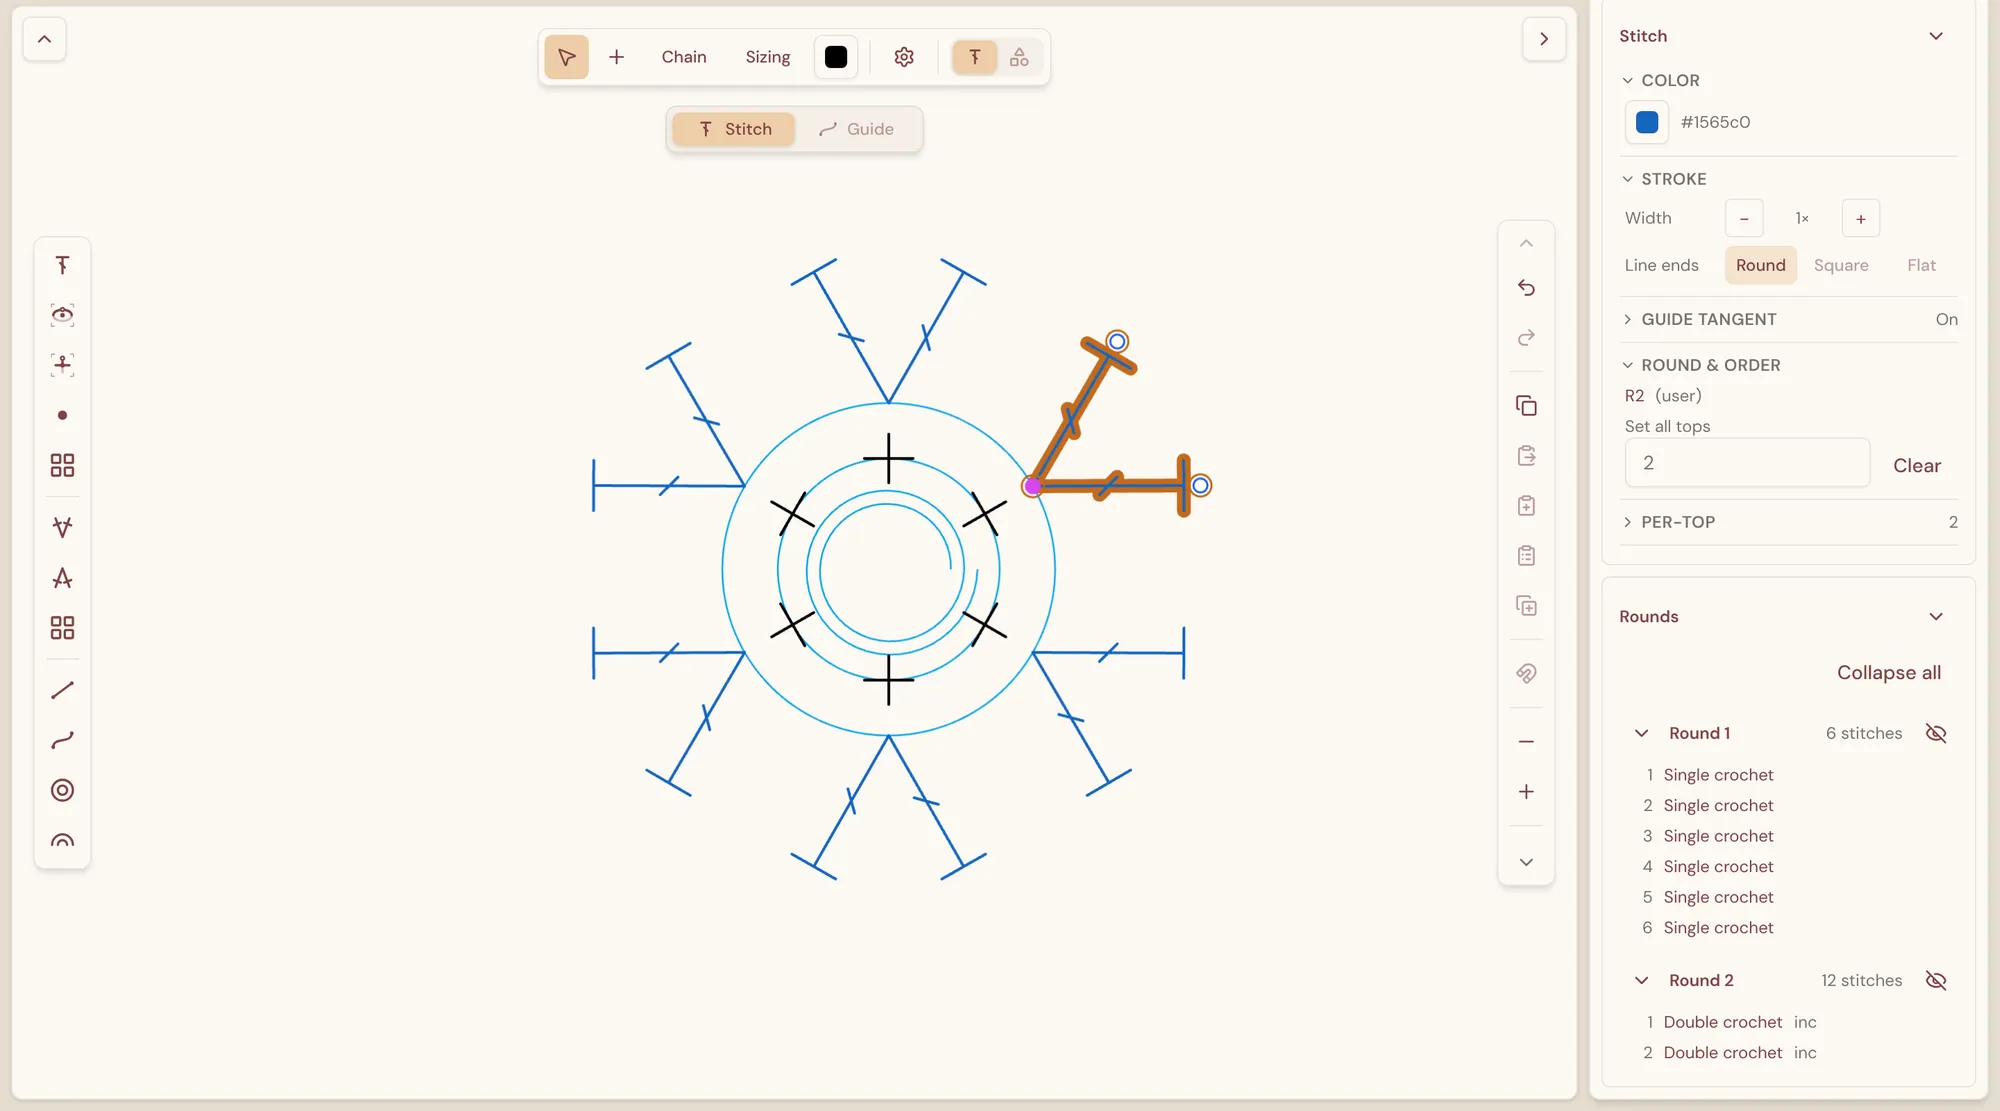
The editor fills the browser window, with your diagram on a canvas in the middle and tools arranged around it.
- Header tray (top) — the app menu (☰), the diagram name, and Save with the save status on the left; Export range and Share on the right. The chevron at the top-left corner of the canvas hides or shows the tray.
- Toolbar (top of the canvas) — the mode buttons (Edit, Place, Chain, Sizing), the stitch color swatch, the Settings gear, and the Stitch / Annotation layer switch.
- Stitch / Guide switch (below the toolbar) — chooses whether you are working with stitches or with the guides that stitches snap to.
- Stitch rail (left edge) — the stitches, increases, and decreases you place on the canvas, with All stitches and All increases & decreases buttons that open the full library. With the Guide tool on, the rail shows guides instead.
- Canvas (center) — where the diagram lives. Each stitch is drawn as its standard crochet symbol. Selecting a stitch shows its handles — the small circles that mark its base and top.
- Action toolbar (right edge of the canvas) — Undo, Redo, copy and paste, Snap to grid, Shorten and Lengthen, Delete, Link stitches, Align direction, and the Groups panel button.
- Properties column (right) — the Inspector, which shows details for whatever is selected (color, stroke, round and order, links, and more), and the Rounds panel, which lists your stitches grouped by round. Drag the column’s left edge to make it wider or narrower; the chevron at the top-right corner of the canvas (or Cmd/Ctrl + \) hides and shows it. Your account picture sits at the top of this column.
On a phone-sized screen the layout is simplified: the name and save status float over the canvas, Export range and Share move into the toolbar, and the panels open as sheets from the bottom of the screen.
Creating a diagram
Section titled “Creating a diagram”- Sign in and go to Your workspace.
- Select New, then New crochet. StitchPress creates an empty diagram named Untitled and opens it in the editor.
- Start adding stitches — see Adding stitches.
To rename a diagram, click its name in the header tray, type the new name, and press Enter.
Your work saves automatically as you go; the status next to Save shows where things stand — for example Synced, or Offline — saved on this device when you have lost your connection. Select Save or press Cmd/Ctrl + S to save right away. If you open the same diagram in another tab or on another device, changes show up in both.
Opening a diagram
Section titled “Opening a diagram”Every crochet diagram you have made appears under Crochet in Your workspace, and in the Crochet gallery in the app menu. Select one to reopen it in the editor exactly as you left it. To rename, share, or delete a diagram, use the ⋯ actions menu on its card.